Showing posts with label SAMSUNG. Show all posts

Monday, January 2, 2017

How To Bypass Unfortunately the FRP Bypass has stopped


Many people has been facing ERROR in “Type Email and Password” on Google Account Manager on the process of bypassing Google Verification (FRP) 
So, i decided to make this Tutorial “How to Bypass Error of Google Account Manager” Unfortunately the FRP Bypass has stopped in “Type Email and Password” for all New devices having (Android 5.1.1 to 6.0.1). 


If you can’t see “Type Email and Password” in your Google Account Manager, like if you see “Error” instead of Type email and password. Then Follow these steps to remove this Error from your device.

This method was tested on so many Device Running Android 5.1.1 and 6.0.1 Also on Samsung Devices such As Galaxy S7 G930, S7 edge G935, Note 7 (2016) SM-N930A but should work also on Note 4 N910F, Note5 N920V, Note7 N930V,  Samsung Galaxy J3 (2016) J320F, Grand Prime SM-G531H, A310M, A510F, A710M (2016). J120F, J200F, J500F/H, J700F/H, E500F, E700F and , and all other Samsung Models whether its 2015 or 2016.

Follow this Guide On HOw to Bypass ERROR in “Type Email and Password” on Google Account Manager or Unfortunately the FRP Bypass has stopped

To Bypass Error in Google Account Manager “Type Email and Password” or Unfortunately the FRP Bypass has stopped on New Devices:

  •  From “Google Account Manager” screen, “Go back <“ and on the Address Bar of Google Chrome, Type : Google.com after that Search for “Google Account Manager” on the Google search bar. And click on the link starts with : apkmirror.com>apk>google.inc. screenshot below..


  •  In the apkmirror site scroll down to have a list of all “Google Account Manager” versions. Download Google Account Manager 6.0.1” For Android 6.0.1 Marshmallow. for Android 5.1.1 Lollipop, will not support this apk so download Google Account Manager with “5.1-1743759” for Android 5.1.1 Lollipop Users.
  • At Google Account Manager screen Scroll Down and tap on “Download APK” screenshot below  and your download will start in a few seconds. Click OK if see you any Pop-up window, then the downloading will be started.


  •  Once download completed, Open the GoogleAccountManager.apk and Tap on “Settings” and Scroll down to enable the “Unoown Sources”. After it just tap on “INSTALL” to install the apk.
  • Tap on “Done” once the apk installed. “Go back <” and on the Address Bar of Chrome Type : Google.com and search for “Quick Shortcut Maker” on the search bar and go to this link.
Recommneded:

  •  Click on “Download APK from APK20” and tap “OK” if you see any Pop-up window and tap on “Replace” if you have already downloaded the apk before, Then Open the apk and tap on “Settings” when it shows “Installed blocked” window. Scroll down and enable the “Unknown Sources” and tap “OK”.
  • Install the application, Once it installed tap on “OPEN” and search for “Google Account Manager” on the search bar of Quick Shortcut Maker application. And then you will see “Type Email and Password” is available now.
  • Tap on “Type Email and Password” and tap on “/Try” and tap on “:” three points on the top right corner of your Samsung Phone Screen.
    Then select “Browsers Sign-In” and “OK”. Now you will see “Google Sign-In” screen with a message “Sign in with your Google Account”
    So, now you can enter your own Google Account, Just enter your Gmail ID and Password. If you don’t have Gmail ID or Google Account Password, Tap on “Create Account” to create one and then Sign-In with it.
    You’ll be redirected to the “Google Account Manager” after Signing-In to your Google Account. Now on this screen Press “Power Button” and Select “RESTART” and wait a few seconds until your Phone Restarted.
    Well, now you can do Initial Setup of your Samsung Phone and there will be no Google Account Locked Screen or FRP Lock any more.
After all this done, Go to “Settings” of your Phone and go to “Back up and Reset” > “Factory Data Reset” and tap on “ERASE EVERYTHING” and wait until your phone restarts.

Feel free to ask me in the comment if you need any further help regarding this.

Also Read:
Turorial On how to Bypass / Remove FRP

Monday, December 26, 2016

Final Solution: Samsung Frp 2016 Security Patch

Final Solution For the Year 2016 Samsung FRP Lock
The tutorial showing below is the final solution to all Samsung Frp Lock 2016 security patch
this method will work on All Samsung with 2016 security patch , an will Also work on below Model:

Galaxy S6
Galaxy S7
Note 5
Note 7
J 5 2016
J710F |2016| Android 6.0.1
G935k
G935w8
J700T1 Versión: 6.0.1
J320F/DS
J700 2016
J710gn
J710FN
G935fxxu1apc8
A310f
A510f

Recommended:
HOW TO REMOVE FRP {Factory Reset Protection} On All Samsung Device
Samsung Frp is Noting
HOW TO REMOVE FRP ON SAMSUNG PHONES USING ODIN
Guide To Bypass / Remove Samsung Account On All Samsung Galaxy 5.1.1

Final Solution: Samsung Frp 2016 Security Patch 

Some people don't even know what is FRP" {factory Reset rotection} ?. Factory Reset Protection (FRP) is a security method that was designed to make sure someone can't just wipe and factory reset your phone if you've lost it or it was stolen. Starting with Android Lollipop, FRP is "standard" in vanilla Android, and most companies making our phones have implemented it in their own models. It's a good thing — it makes a stolen phone harder to use, which makes it less appealing to thieves, and anything that can protect our data on a phone we've lost is welcome.
The problem is that people are selling or trading or even giving away phones with FRP enabled and this makes things difficult for the next user.
How it works explains why. If you reset a phone with FRP enabled, you have to provide the user name and password for the last Google account that was registered with the device. There are random work-arounds on the Internet, but they tend to get patched almost as soon as they are discovered. You'll pretty much need to know the login details for the last account to use the phone before you can do anything with it if FRP was enabled before you reset it.
     But since different OEMs use different variations of Android, vulnerabilities can arise. This particular method should work on recent Samsung devices like the Galaxy S6, S6 edge, S6 active, S6 edge+, Note5, S7, S7 edge, S7 active, and even the brand new Note7. It is entirely possible that it will work with other modern Samsung phones as well, though.


Just a Simple Method ( Samsung FRP Final 2016 Security Patch )

      As per users report, Make sure that all Protected Smart card Softwares are disconnected While using this software, because this might Block Or Deactivate the smart-card.
Here are the steps to remove factory reset protection / Google previously synced account lock from your Samsung device.

  • Start phone and connect to WIFI also plug into the computer with your usb cable.
  • Start RealTerm on your pc and under pisplay check the box HALF DUPLEX
  • Right click on my computer and select manage once it opens click device manager then modems
  • Under modems you should see a Samsung device. right click it then select properties
  • Once the properties window opens select modem tab and see what port it is on like com5 for an example
  • Now that you know the com port number close all device manager windows and open RealTerm again
  • Under the ports tab in RealTerm enter your port number then click change.
  • Next, click the send tab. you will need to send these two commands with the Send ASCII button

  • First at+creg?\r\n

  • Then atd1234;\r\n

  • Look at your phone and the dailer will pop up.
  • Now watch the video below to see the rest of the steps and please comment below on your success or failures.
NOTE: If you dont have a SDcard and are getting the sparse ERROR in es file explorer then you can buy a OTG flash drive and load the FRPbypass.apk to it from your computer then plug it into the phone. once plugged in navigate to it in es file explorer and install the frp bypass app that way. You can also put this address into your ES file Explorer App
You can Also watch the video Tutorial below


Source : RootJunky.com

Friday, December 16, 2016

Samsung Frp is Noting: Can You Tell Us How You Remove Yours?

HOW TO REMOVE FRP ON SAMSUNG 2016 SECURITY PATCH


Some People Are Still Finding How To Remove FRP On Samsung Devices
While Some don't Even Know What Is FRP.

Some People Are Still Finding How To Remove FRP On Samsung Devices.  I dont know why some Engineers, Peoples, begging calling, messaging, on how to remove FRP on Samsung Devices, some will Say '2016 security patch' well' we have Uploaded different Videos method on YouTube, an  also many Tutorial on 9jaROM.

Recommended:
TODO EN 1 FRP REMOVER 2016 V1.0 By GSM TECHNOLOGY TEAM
DOWNLOAD D-G FRP Unlocker Tools 2016
Download 9jarom Fastboot Frp Unlocker
Download HTC Frp Remover


While Some Don't Even Know What Is FRP. Factory Reset Protection (FRP) is a security method that was designed to make sure someone can't just wipe and factory reset your phone if you've lost it or it was stolen. Starting with Android Lollipop, FRP is "standard" in vanilla Android, and most companies making our phones have implemented it in their own models. It's a good thing — it makes a stolen phone harder to use, which makes it less appealing to thieves, and anything that can protect our data on a phone we've lost is welcome.
The problem is that people are selling or trading or even giving away phones with FRP enabled and this makes things difficult for the next user.
How it works explains why. If you reset a phone with FRP enabled, you have to provide the user name and password for the last Google account that was registered with the device. There are random work-arounds on the Internet, but they tend to get patched almost as soon as they are discovered. You'll pretty much need to know the login details for the last account to use the phone before you can do anything with it if FRP was enabled before you reset it.

HOW TO REMOVE FRP ON SAMSUNG 2016 SECURITY PATCH?

Requirement:
Sim Card
SDCard
Internet Access (Wifi, e.t.c.)
Brain.

Method:

  • Download THIS an THIS copy this two files (Apk) to SdCard  
  • Block your sim card with Pin 
  • Switch on your phone and connect with WiFi
  • Switch it off Again
  • insert block simcard into the phone you want to remove FRP an power on the phone 
  • Now switch on your mobile
  • Phone will ask pin code enter the pin code, and start the phone. 
  • Restart your phone again, it will asked pin number (this time. don't enter your Pin)
  • Now make emergency call (112, 911)  phone should attend by some one
  • When call is getting connected
  • Slide the screen and tap at internet logo
  •  It will asked sim pin again put the pin number, and select phone browser (don't select chrome)
  • Open the browser and go to download history
    select files (you have downloaded @ Top).
      1st. install Android 6 Google_Account_Manager
      2nd. install QuickShortcutMaker
    make sure Android 6 Google_Account_Manager install before open QuickShortcutMaker.
  • Open QuickShortcutMaker and search "Google Account"
  • Select Google Account Manager from the list
  • Under Google Account Manger, scroll down and select the option with Type Email and Password 
  • Now Tap Try to launch it
  • You will now see Re-type password page
  • Tap the 3 dots at top right and select Browser Sign-in
  • Click OK and sign in your Account
  • After a successful Sign-in, you will be faced with Quick Shortcut App interface
  • Reboot the phone and set it up normally.
  • Finally You have successful remove FRP on Samsung 2016
That's why i said Above That Samsung Frp is Noting:


Also Read:
So How Do you Remove FRP on latest security ?

Sunday, December 4, 2016

Download GT-S7568i Firmware Flash File

Download GT-S7568i Firmware Flash File Stock ROM


GT-S7568I Specs 
Other names: GT-S7568I
Dimensions: 121,5 x 63,1 x 10,85 mm
Weight: 126 g
GSM frequencies: 900/1800/1900
Standard battery: Li-Ion 1500 mAh
Internal memory: 4 GB
Memory cards: microSD, microSDHC, max 32 GB
Operating system: Android 4.1 Jelly Bean
Processor: Spreadtrum SC8810 1,00 GHz

Multimedia
Main display: IPS TFT 16M colors 480 x 800 px (4.00″) 233 ppi
Touchscreen: Yes
Digital camera: 3 Mpx, 2048x1536 px
Video: MPEG4, H.263, H.264, 1280x720 px
MP3: Yes
Radio: Yes

S7568iZMUAMI1


FOLLOW 
Download an install samsung usb drivers from here.
Download odin (latest version preferred) from here.
Download the exact rom of your device. Check out samsung roms from here.
Launch odin
Make sure only Auto Reboot & F. Reset Time is ticked.
Put your device into download mode by pressing down Volume Down > Home > Power key
Press volume up on the screen that has a yellow triangle to get into odin mode.
Connect the device to the computer.
Added!! will be seen showing the device has connected successfully.

Click on AP (new versions of odin) or PDA (older versions of odin).
Navigate to the folder containing the rom of the device.
Select the rom. (roms names always end with .tar or .md5).
Wait for odin to process the rom.
Click start.
The flashing or upgrading process will now begin.
A green progress bar will be seen at the top left.
This process will take about 8 mins or more (depends on the size of the rom.
When you see PASS! at the top of odin 
 know that you have successfully flashed or upgraded the device
The device will reboot.
First boot after this process takes time. Be patient.......................
Do a factory reset if phone bootloops.
Press Volume up > Home > Power key
Select factory reset.
Scroll down to Yes. 

Wednesday, November 30, 2016

How To Fixed Samsung S7, S7Edge DRK & Root Solution


Samsung S7, S7Edge DRK & Root Solution Free


Samsung S7, S7Edge DRK & Root Solution

What's DRK?
       Device Root Key This Happen with Rooted Device, like S6/S6 Edge, S6 Edge plus, Note 5, S7/S7 Edge etc.
Afetr flash rooted Device it will stuck on start up with "dm-verity verification failed..." ..need to check DRK first... picture above.
 is a device-unique asymmetric key pair that is signed by Samsung’s root key through an X.509 certificate. This certificate proves that the DRK was produced by Samsung.


HOW TO FIX.
1st Download twrp of you Model from above Link
Flash twrp using odin Learn how to Use Odin From Here
wipe data Factory reset
install Samsung S7 DRK Fix download from here
again wipe reboot again twrp recovery mode
install BETA-SuperSU-v2.71 download from here
DRK Fixed
Also Root Successful

Thursday, November 24, 2016

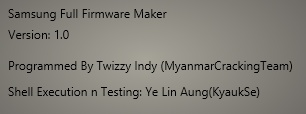
Download SamSung 4Files Full Repair Firmware Maker

Download SamSung 4Files Full Repair Firmware Maker


This Tool Allow You to create Samsung 4Files (Full Repair Firmwares),
After creating. You can use the Repair Firmwares to Fix your Samsung Android Smartphone or Tablet, These will contain the full set of Samsung firmware files,  you will get PDA, AP, Modem, Phone, CP, BL, Bootloader, and CSC file.


Requirement:Microsoft DotNet 4.0 Framework
Dependencies: libarchive2, bzip, ICSharpCode’s ShareZipLib, CustomControls, sfk

How to use
Download Samsung 4Files Full Firmware Maker From here
1. Click Open to choose .tar.md5 which is in your firmware zip
Click Unpack button to unpack rom first
Finally ,
Click Make button and wait for finished
4 files will out in Samsung Firmware Maker’s directory


Credits.


Friday, October 28, 2016

HOW TO REMOVE FRP ON SAMSUNG PHONES USING ODIN


SMSUNG FRP UNLOCK REMOVER FILES 2016

The Pack below contain FRP files for the following phones below
Samsung included the factory reset protection on most of their new devices. So after using factory reset from recovery menu, setting up the phone requires you to enter the Google account used previously on the phone which can be annoying especially if you bought the phone from someone and just need to set it up as a new device.

YOU MIGHT ALSO LIKE :

HOW TO REMOVE FRP LOCK ON SAMSUNG USING SIDESYNC


HOW TO REMOVE FRP {Factory Reset Protection} On All Samsung


TODO EN 1 FRP REMOVER 2016 V1.0 By GSM TECHNOLOGY


How to remove Factory Reset Protection on Samsung devices Using Miracle box


DOWNLOAD D-G FRP Unlocker Tools 2016


SAMSUNG FRP RESET FILES I

....................................................................................................................................
SBOOT_N920G_OJ4
SBOOT_N920I_OJ4
SBOOT_N920K_OJ4
SBOOT_SM-A800IZ_OJ1
SBOOT_SM-A800I_OJ3
SBOOT_SM-A800YZ
SBOOT_SM-G9200_OJ2
SBOOT_SM-G9208_OGB
SBOOT_SM-G920AZ_OJ6
SBOOT_SM-G920A_OJ7
SBOOT_SM-G920F
SBOOT_SM-G920G1_OI5
SBOOT_SM-G920I_OGA
SBOOT_SM-G920I_OJ6
SBOOT_SM-G920K_OJ2
SBOOT_SM-G920K_PAD
SBOOT_SM-G920L_OH8
SBOOT_SM-G920L_OJ2
SBOOT_SM-G920P_OH1
SBOOT_SM-G920R4_OD3
SBOOT_SM-G920S_PAC
SBOOT_SM-G920T1_OJ6
SBOOT_SM-G920T_OF6
SBOOT_SM-G920T_OJ7
SBOOT_SM-G920W8_OI1
SBOOT_SM-G925A_OJ7
SBOOT_SM-G925F_OJ1
SBOOT_SM-G925ID_OGA
SBOOT_SM-G925I_OGA
SBOOT_SM-G925I_OJ6
SBOOT_SM-G925K_OJ2
SBOOT_SM-G925K_PAD
SBOOT_SM-G925L_OJ2
SBOOT_SM-G925L_PAD
SBOOT_SM-G925P_OH1
SBOOT_SM-G925R4_OG9
SBOOT_SM-G925R7_OJ4
SBOOT_SM-G925S_OH7
SBOOT_SM-G925S_OJ1
SBOOT_SM-G925T_OI1
SBOOT_SM-G925T_OJ7
SBOOT_SM-G925W8_OI1
SBOOT_SM-G925W8_OJ7
SBOOT_SM-G9287C_PB4
SBOOT_SM-G9287_OH2
SBOOT_SM-G928A
SBOOT_SM-G928C
SBOOT_SM-G928C_OJ5
SBOOT_SM-G928F
SBOOT_SM-G928G
SBOOT_SM-G928G_OJ4
SBOOT_SM-G928I
SBOOT_SM-G928P
SBOOT_SM-G928R4
SBOOT_SM-G928S
SBOOT_SM-G928T_OH4
SBOOT_SM-G930F_PAV
SBOOT_SM-G935F_PB9
SBOOT_SM-N9200_OKA
SBOOT_SM-N9208_OK8
SBOOT_SM-N920C_OH2
SBOOT_SM-N920G_OH3
SBOOT_SM-N920I_OH2   
SBOOT_SM-N920K_OH6
SBOOT_SM-N920L_OHB
SBOOT_SM-N920P_SPR
SBOOT_SM-N920R4_PB6
SBOOT_SM-N920S_OHB
SBOOT_SM-N920T_OJ5
SBOOT_SM-N920V_OGJ
SBOOT_SM-N920W8_OI1

DOWNLOAD ALL @ ONCE FROM HERE
SEARCH FOLDER AND DOWNLOAD ONE BY ONE FROM HERE


SAMSUNG FRP RESET FILES LATEST SECURITY

Samsung_FRP_ Reset_ File_MODEM_G920F_OJ1
Samsung_FRP_ Reset_ File_MODEM_G920I_OJ6
Samsung_FRP_ Reset_ File_MODEM_G920T1_OI5
Samsung_FRP_ Reset_ File_MODEM_G920T1_OJ6
Samsung_FRP_ Reset_ File_MODEM_G920T_OJ7
Samsung_FRP_ Reset_ File_MODEM_G920w8_OJ7
Samsung_FRP_ Reset_ File_MODEM_G925F_OJ1
Samsung_FRP_ Reset_ File_MODEM_G925I_OJ6
Samsung_FRP_ Reset_ File_MODEM_G925T_OJ7
Samsung_FRP_ Reset_ File_MODEM_G925w8_OJ7
Samsung_FRP_ Reset_ File_MODEM_G928C_OJ5
Samsung_FRP_ Reset_ File_MODEM_G928F_OJ5
Samsung_FRP_ Reset_ File_MODEM_G928G_OJ4
Samsung_FRP_ Reset_ File_MODEM_G928I_OJ4
Samsung_FRP_ Reset_ File_MODEM_G928T_OJ5
Samsung_FRP_ Reset_ File_MODEM_G928w8_OGD
Samsung_FRP_ Reset_ File_MODEM_N920C_OJ5
Samsung_FRP_ Reset_ File_MODEM_N920G_OJ4
Samsung_FRP_ Reset_ File_MODEM_N920I_OJ4
Samsung_FRP_ Reset_ File_MODEM_N920T_OJ5
Samsung_FRP_ Reset_ File_MODEM_N920w8_OI1
Samsung_FRP_ Reset_ File_SBOOT_G920F_OJ1
Samsung_FRP_ Reset_ File_SBOOT_G920I_OJ6
Samsung_FRP_ Reset_ File_SBOOT_G920t1_OI5
Samsung_FRP_ Reset_ File_SBOOT_G920t1_oj6
Samsung_FRP_ Reset_ File_SBOOT_G920t_oj7
Samsung_FRP_ Reset_ File_SBOOT_G920w8_OJ7
Samsung_FRP_ Reset_ File_SBOOT_G925F_OJ1
Samsung_FRP_ Reset_ File_SBOOT_G925I_OJ6
Samsung_FRP_ Reset_ File_SBOOT_G925t_oj7
Samsung_FRP_ Reset_ File_SBOOT_G925w8_OJ7
Samsung_FRP_ Reset_ File_SBOOT_G928C_OJ5
Samsung_FRP_ Reset_ File_SBOOT_G928F_OJ5
Samsung_FRP_ Reset_ File_SBOOT_G928G_OJ4
Samsung_FRP_ Reset_ File_SBOOT_G928I_OJ4
Samsung_FRP_ Reset_ File_SBOOT_G928t_oj5
Samsung_FRP_ Reset_ File_SBOOT_G928w8_OGD
Samsung_FRP_ Reset_ File_SBOOT_N920C_OJ5
Samsung_FRP_ Reset_ File_SBOOT_N920G_OJ4
Samsung_FRP_ Reset_ File_SBOOT_N920I_OJ4
Samsung_FRP_ Reset_ File_SBOOT_N920t_oj5
Samsung_FRP_ Reset_ File_SBOOT_N920w8_OI1
Samsung_FRP_ Reset_ File_G550FY
Samsung_FRP_ Reset_ File_G920T
Samsung_FRP_ Reset_ File_G925i_OJ6_SBOOT_MODEM
Samsung_FRP_ Reset_ File_J700F
Samsung_FRP_ Reset_ File_N920G
Samsung_FRP_ Reset_ File_SBOOT_MODEM_SM_J700H
Samsung_FRP_ Reset_ File_MODEM_SM_J500H
Samsung_FRP_ Reset_ File_SBOOT_MODEM_N920
Samsung_FRP_ Reset_ File_MODEM_SM_G600FY
Samsung_FRP_ Reset_ File_J200G_SBOOT

DOWNLOAD ALL @ ONCE FROM HERE
SEARCH FOLDER AND DOWNLOAD ONE BY ONE FROM HERE

This tutorial will show you how to remove this FRP lock on Samsung devices using odin.
First of all you will need to Download and install Samsung USB drivers from here
If you get and error message with invalid md5, rename the file from tar.md5 to .tar

Download Odin from here
Download and extract FRP Reset Pack below
Inside the extracted folder, you will see FRP of different devices. 
Extract the one of the device you want to remove FRP lock

Launch OdinTool
Click on PDA or AP button if the file is .bin Click on CP
Navigate to the folder containing the FRP file of your device
Select the file (eg SBOOT_N920G_OJ4.tar or SBOOT_N920G_OJ4.bin
Boot device into download mode by Holding Volume Down + Home + Power button
Now press volume Up
Connect device to PC using USB 
Odin will detect device and display its COM PORT
Click Start button and wait for process to complete (takes about 5secs)
Reboot Device..

Wednesday, October 5, 2016

SAMSUNG SM-G550T1 ON5 FIRMWARE UNLOCK + ROOT File


Download SAMSUNG GALAXY SM-G550T1 ON5 Firmware

This firmware is only for SAMSUNG GALAXY SM-G550T1 ON5

Learn how to flash this firmware from here or below

Download more Samsung firmware from here

Download Samsung flashing tool from here or latest from here


SAMSUNG GALAXY SM-G550T1 ON5 ROM

G550T1_G550T1UVU1APF1_METROPCS_USA_4FILES_v6.0.1


UNLOCK + ROOT SAMSUNG SM-G550T1 6.0.1

Odin md5 error! Binary is invalid solution

1-Right click on the file and choose rename
2-just deleted the .md5 in the end of the filenames and it was fixed.


HOW TO FLASH (OPTIONAL)
 or follow here with picture Guide 

Download an install samsung usb drivers from here.
Download odin (latest version preferred) from here
Launch odin
Make sure only Auto Reboot & F. Reset Time is ticked.

Put your device into download mode by pressing down Volume Down > Home > Power key
Press volume up on the screen that has a yellow triangle to get into odin mode.

Connect the device to the computer.
Added!! will be seen showing the device has connected successfully.

Click on AP (new versions of odin) or PDA (older versions of odin).
Navigate to the folder containing the rom of the device.
Select the rom. (roms names always end with .tar or .md5).
Wait for odin to process the rom.
Click start.

The flashing or upgrading process will now begin.
A green progress bar will be seen at the top left.
This process will take about 8 mins or more (depends on the size of the rom.
When you see PASS! at the top of odin GUI know that you have successfully flashed or upgraded the device

The device will reboot.
First boot after this process takes time. Be patient.......................

Do a factory reset if phone bootloops.
Press Volume up > Home > Power key
Select factory reset.

Download Samsung Galaxy Note II SGH-I317 Repair Firmware 4 Files


Download Samsung Galaxy Note II SGH-I317 4 Files Firmware

This Firmware is only for samsung note II sgh-i317 
Flash it using Odin Tool
It highly recommend to flash Pit File when flashing samsung repair firmware 4 files

Download samsung pit files from here

Learn how to flash samsung firmware from here

Download more samsung phone firmware from here


Galaxy Note II SGH-I317 4 Files 

i317UCUBMK6_ATTBMK6_4.3


General Info
Manufacturer Samsung
Providers 
Processor
Quad core, 1600 MHz, ARM Cortex-A9
Speed 1.6 GHz
Storage / Memory
Memory RAM 2.0 GB
Memory ROM 16.0 GB
MicroSD 64.0 GB max + MicroSD 2.0 compatible
Display / Screen
Super AMOLED capacitive touchscreen, 16M colors
Resolution 1280 x 720 pixels
Display Size 5.50 inches
Features 
Physical
Size
(L x W x D) 151.10 x 80.50 x 9.40 mm 
5.95 x 3.17 x 0.37 inches
Weight 183.00 grams 
6.46 ounces
Form Factor Slate
Available Colors 
Titanium (Grey)
White
Camera(s)
Megapixels 8.0 megapixels
Features 

Friday, September 16, 2016

Download Samsung SHV-E110S Firmware / Stock rom


Download Galaxy S2 LTE SHV-E110S Firmware


Galaxy S2 LTE SHV-110S.4.1.2.KIES_HOME_E110SKSJMH2
Android 4.1


learn How To Flash / Upgrade Samsung SHV-E110S Below
Download an install samsung usb drivers from here.
Download Odin (latest version preferred) from here.
Download the exact rom of your device. Check out Samsung Roms from here.

ALSO PROVIDE YOU A USEFULL LINKS::


Tuesday, August 30, 2016

Guide To Bypass / Remove Samsung Account On All Samsung Galaxy 5.1.1


Guide to Bypass Samsung Account On All Samsung Galaxy 5.1.1 After Perform Hard Reset.
Bypass Samsung Account On All Samsung Galaxy 5.1.1
Samsung account removal tool guide below...

They stuck on the screen which user must enter their user and password, like shown below. It may be considered an abnormal factory reset or hard reset has been made by user on Samsung Galaxy device, and this caused your device is locked. So you must enter Samsung Account that you have already signed in on your Samsung galaxy device to confirm that it belongs to you.
 If now you need an information on how to remove or bypass it, you can follow this guide to Bypass Samsung Account On All Samsung Galaxy 5.1.1 After Perform Hard Reset.

Needed tools.
You must download a small apllication (*.apk) this called samsung bypass .apk. Here
USB OTG. or Sidesyc

Guide to Bypass Samsung Account On All Samsung Galaxy 5.1.1 After Perform Hard Reset.

Make sure you have download apk from link above.
Then copy apk file to USB OTG and put the file outside the folder.
Connect your phone to Wi-Fi
Follow all step on startup guide Samsung Galaxy
Fill all form show on your screen, until you see this screen.

Bypass Samsung Account On All Samsung Galaxy 5.1.1 After Perform Hard Reset

On this screen, you must input your Samsung Account. 
If you forgotten your Samsung Account, you can follow this guide.
Insert your OTG USB to your smartphone.
Then on Step number 6, tap back.

Bypass Samsung Account On All Samsung Galaxy
Once your OTG USB ready on your smartphone, you will see your *.apk file appear on screen.
bypass samsung
Now, tap samsung bypass google verify.apk, and you will see a warning that install blocked.

install blocked - bypass samsung account

Then you can tap Settings.
Scroll down all menu on this screen, untill you find Unknow Sources menu. 
Now, enable this menu, and OK
Then your screen will bring back to Development Settings, 
Now tap Install.
Once installation finished now tap Open.
Scroll down menu and find Accounts.
Then tap Add accounts
Now tap Samsung Accounts.
Then tap Sign In
wen loggin completed
you can now restart an loggin if ask 
Now goto settings
An perform HardReset.
Done..


Make a comment if helpfull
make a comment if you have a question
Always drop a comment...


Friday, August 12, 2016

HOW TO ROOT AND UNLOCK SAMSUNG G903F Galaxy S5 Neo G903F

HOW TO ROOT AND UNLOCK SAMSUNG Galaxy S5 Neo G903F
HOW TO UNLOCK G903F Galaxy S5 Neo G903F WITH Z3X


FOLOW THE GUIDE BELOW TO UNLOCK AN ROOT Galaxy S5 Neo G903F
Requiremnet 
PC
Galaxy S5 Neo G903F prepared_boot_51.1 from here
Z3X  from here

Steps:
Extract downloaded Galaxy S5 Neo G903F prepared_boot_51.1 to destop
Extract z3z box crack tmo desktop
open Odin3 v3.07 inside the prepared_boot_51.1 folder
load Galaxy S5 Neo G903F prepared_boot_51.1.tar.md5 in AP 
Flash prepared_boot_51.1.tar.md5
after flash done 
screenshot

open z3x 
select you model 
under unlock tab 
select device in adb mode
click unlock 
Unlocked !

Thursday, July 14, 2016

How To Download Samsung Firmware Completely free with no download speed restrictions.


How To Download Samsung Firmware Completely free with no download speed restrictions.


fw.updato.com lets you download any samsung firmwares / Stock ROMs,
Completely free with no download speed restrictions. 
To download Any samsung stock ROMs 

enter your device model number 
select Android Version


Download Now


After downloading this firmware lean how to flash / use it below or from here

Download an install samsung usb drivers from here.
Download odin (latest version preferred) from here
Launch odin
Make sure only Auto Reboot & F. Reset Time is ticked.

Put your device into download mode by pressing down Volume Down > Home > Power key
Press volume up on the screen that has a yellow triangle to get into odin mode.

Connect the device to the computer.
Added!! will be seen showing the device has connected successfully.

Click on AP (new versions of odin) or PDA (older versions of odin).
Navigate to the folder containing the rom of the device.
Select the rom. (roms names always end with .tar or .md5).
Wait for odin to process the rom.
Click start.

The flashing or upgrading process will now begin.
A green progress bar will be seen at the top left.
This process will take about 8 mins or more (depends on the size of the rom.
When you see PASS! at the top of odin GUI know that you have successfully flashed or upgraded the device

The device will reboot.
First boot after this process takes time. Be patient.......................

Do a factory reset if phone bootloops.
Press Volume up > Home > Power key
Select factory reset.
Scroll down to Yes. 

 Download the Android app 

let Us know what kind of mobile phone firmware you are still searching for in comment box ..

Saturday, June 4, 2016

HOW TO EXIT FACTORY MODE ON SAMSUNG GALAXY DEVICES


How to Exit Factory Mode for Samsung Galaxy Devices
If your device display a annoying transparency black background which contains some info about your device (PDA, Phone, CSC, H/W, Camera, …)
PDA:1437UCALI6
Phone:1437UCLI6
H/W:REV1.0
RF Cal Date:2013.06.01
SMD:01N, PBA : 04N
CAMERA:N/A, FrontCAM:N/A
TSP:
TSK:0x09
Band:HSPA,CH:N/A
UART:N/A,USB:N/A
in yellow text … and lock screen is not working, mean that your device is in factory mode.

“Factory Mode” is enabled if the EFS partition is corrupted because of installing custom ROMs, bad Mods or downgrading your current system version or after you succeeded in fixing the EFS partition.


  • To Fix this problem it require knowledge
  • Rooted Samsung device
  • Root file explorer Root Explorer


Steps :

Go to Local
 / Device >
         efs >
        FactoryApp
and open factorymode as text in “ES Note Editor”
Change it from OFF to ON and save it
Open keystr as text in “ES Note Editor”, change it from OFF to ON and save it
Reboot.

Method 2 
Install “Terminal Emulator

Type :
su

Type:
rm /efs/FactoryApp/keystr
rm /efs/FactoryApp/factorymode
echo -n ON >> /efs/FactoryApp/keystr
echo -n ON >> /efs/FactoryApp/factorymode
chown 1000.1000 /efs/FactoryApp/keystr
chown 1000.1000 /efs/FactoryApp/factorymode
chmod 0744 /efs/FactoryApp/keystr
chmod 0744 /efs/FactoryApp/factorymode
reboot


Method 3
WITHOUT ROOT

You can also exit factory mode and remove the annoying message without root, but it won’t fix it :
Go to Settings>
 Application manager >
All>
Search Factory Test
and “Clear data”, “Clear cache”